Scheduling Messages
Sending passes out to your existing member base may be done in bulk. This should be scheduled for after the following tasks are complete:
- You have created and customized your Digital Pass Configuration(s).
- You have activated Auto Pass Generation on your Digital Pass Configuration(s).
- You have created your Install Message (email OR text may be used for the bulk existing members process)
To schedule your install message to send to all existing members, navigate to Messaging Service > Scheduled Message. Click Create Scheduled Message, designate a name, and select Existing Member Install.
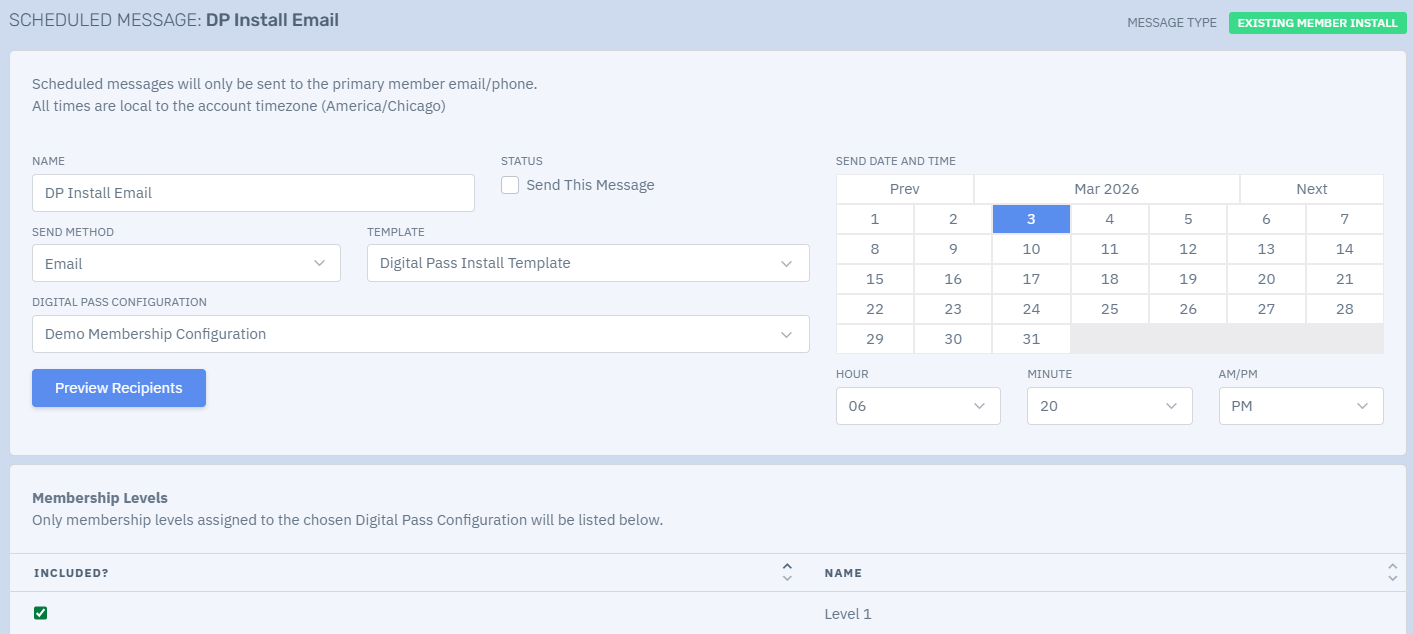
On the Scheduled Message page, make your selections as desired.
- Send Method: Email or SMS
- Template: select your message template. Be sure this includes the digital pass install link!!!
- Digital Pass Configuration: select your configuration. This will then generate the associated levels in the Membership Levels list below. You may then select the levels to include in the scheduled message.
- Send Date and Time: select a date in the future.
- Check the box to Send This Message only once you have confirmed all above settings. Before enabling, you may Preview Recipients. Once the message has been queued, you cannot stop the message from sending.
Processed Reports
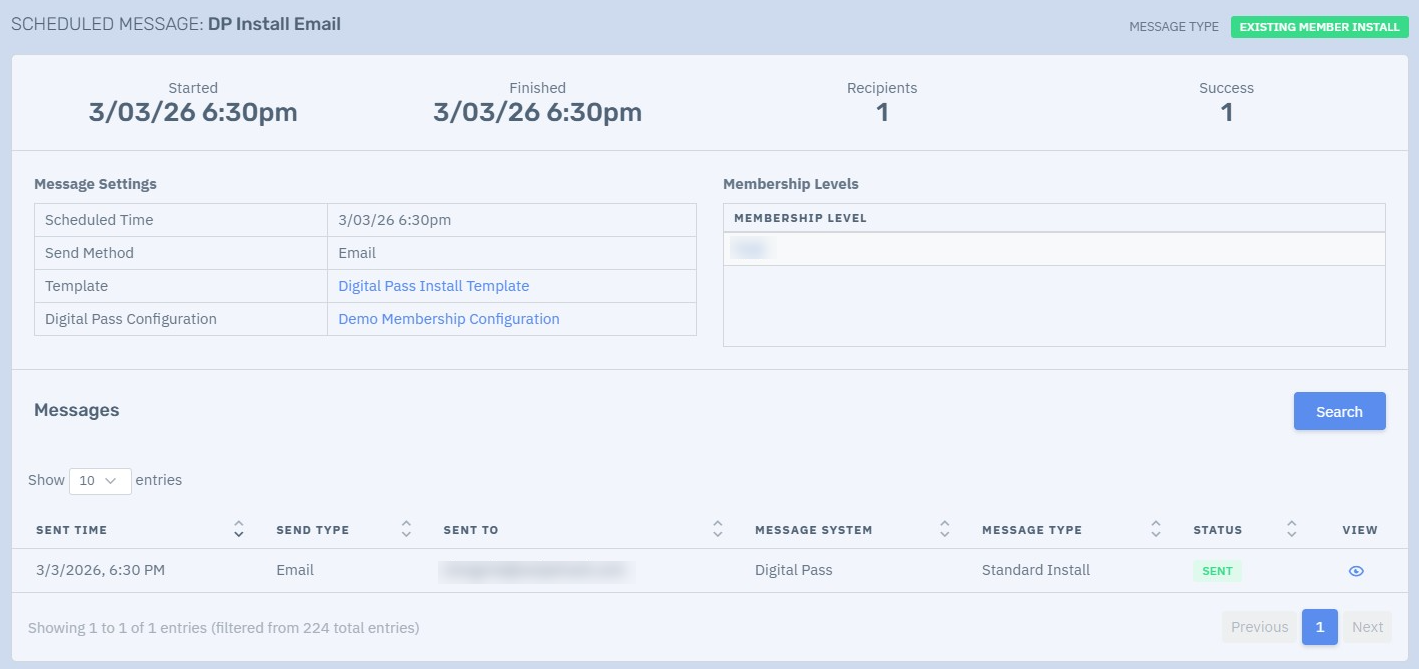
After your message has been sent (or is in progress), you can view your Processed Report by clicking the Processed tab on the Scheduled Messages page. The processed report will provide all the details about the sending of your Install Email, as well as a list of the recipients with link to view the message received. In the case of an undelivered message, you may want to visit the constituent profile and make any needed updates to the constituent email address on file.
Note: The Processed Report will appear before all messages have finished sending, please be patient :)