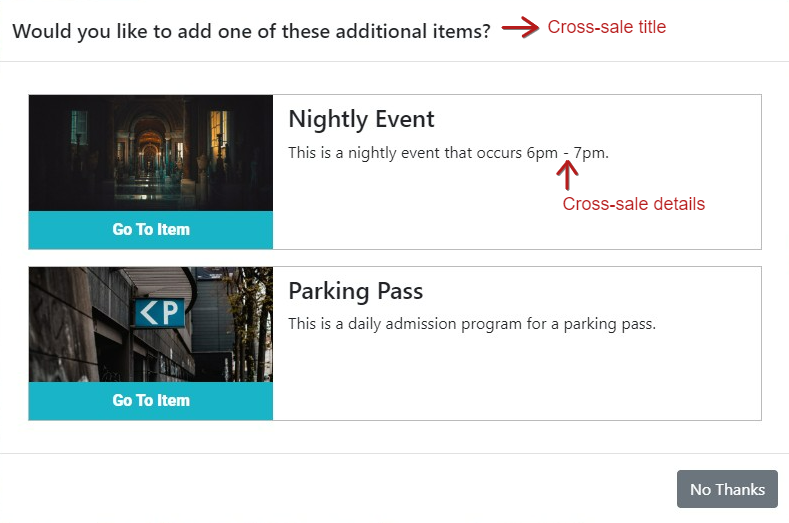
You can configure a Cross-Sale pop-up on any Program, Combo, or Membership portal page. A cross-sale is a simple suggestion for the customer to add additional items to their cart. The pop-up will appear after an item has been added to cart. The customer can then select to go to the cross-sale product page, or continue shopping.
How to add a cross-sale to a web portal page:
- From the Main Menu, navigate to Online Sales > Portals > Edit Portal > Menu.
- Select Pages for a menu item, then click Edit for the page on which you'd like to add a cross-sale.
- On the page taskbar above the display image, click Cross-sale.
- Click Add Cross-sale.
- Add a Cross-sale Title (see image below for how this will appear on the pop-up).
- Select the product that will trigger the cross-sale and click Save Cross-sale.
- Click Edit next to the created Cross-sale.
- Click Add Target. You may add 1 or 2. These items must already exist as pages on your web portal (they can be hidden).
- Select your target portal page from the dropdown and add Cross-Sale Details as needed (see image below for how this will appear on the pop-up).
- When you're ready to go live with the cross-sale, check the box to Enable Cross-Sale in Portal.
- Be sure to Sync Changes in order to see the cross-sale appear on your live portal.